How to do a Wright-Giemsa Stain

Introduction
Wright-Giemsa Stains, derived from the once groundbreaking Romanowsky stains, are stains used in hematology and cytology studies to differentiate cells in microscopic examinations of peripheral blood and bone marrow specimens.
These stains can also be applied to detect the presence of parasites in the blood, such as the Plasmodium parasite that causes malaria, when rapid results are needed.
There are a variety of Romanowsky stain types that apply the same principle. They include:
- Giemsa stain
- Wright and Wright-Giemsa stain
- May-Grunwald stain
- Leishman stain
The History of the Wright-Giemsa Stain
This complex of stains was named after Dmitri Leonidovich Romanowsky, a Russian physician who first identified the importance of using blood samples to diagnose hematological disease in 1891.
The Romanowsky stain is comprised of oxidized methylene blue, sometimes referred to as "azure," and eosin Y dyes. The azure dyes are basic and bind to acid nuclei forming a blue-to-purple color. The acidic dye, eosin, binds to alkaline cytoplasmic components forming a red, orange, or pink coloration. Romanowsky stains produce a variety of hues, allowing for simplified differentiation and identification of various cellular components and potential anomalies. This ability is known as the Romanowsky effect, also known as metachromasia.
Identification of red blood cell features, leukocyte nuclear morphology, platelet counts, and even parasite identification are just a few examples of the wide array of diagnostic tools these dyes allow us to employ.
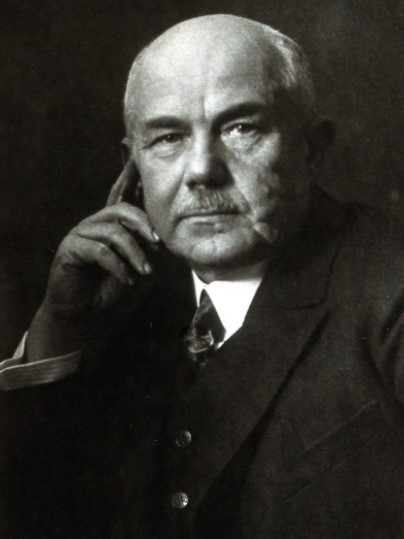
In 1902, James Homer Wright (pictured right), modified the Romanowsky stain to more easily distinguish between the different blood cells. The Wright stain uses heated methylene blue combined with eosin Y to form an eosinate, which is then dissolved in methanol.
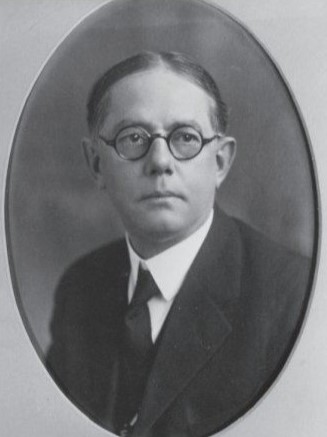
Then in 1904, Gustav Giemsa (pictured left), a German chemist and bacteriologist, modified the stain further by stabilizing the stain with glycerol.
When the Giemsa stain is combined with the Wright’s Stain, the color brightens to a reddish-purple in the cytoplasmic granules. This is known as the Wright-Giemsa stain, which is still widely used today.
The Wright-Giemsa stain is a hematological stain for differential staining procedures for peripheral blood and bone marrow. This stain can be useful for diagnosing various types of anemia, infections, and leukemia.
It is also useful when rapid results are needed in the detection of blood parasites, such as the malaria-causing Plasmodium spp. or Trypanosomes.
Wright-Giemsa Stain Procedure
Preparing specimen smears: Blood Smears
Make blood smears immediately if no anticoagulant is employed, such as with blood obtained from a finger stick. Should an anticoagulant be used, EDTA is recommended.
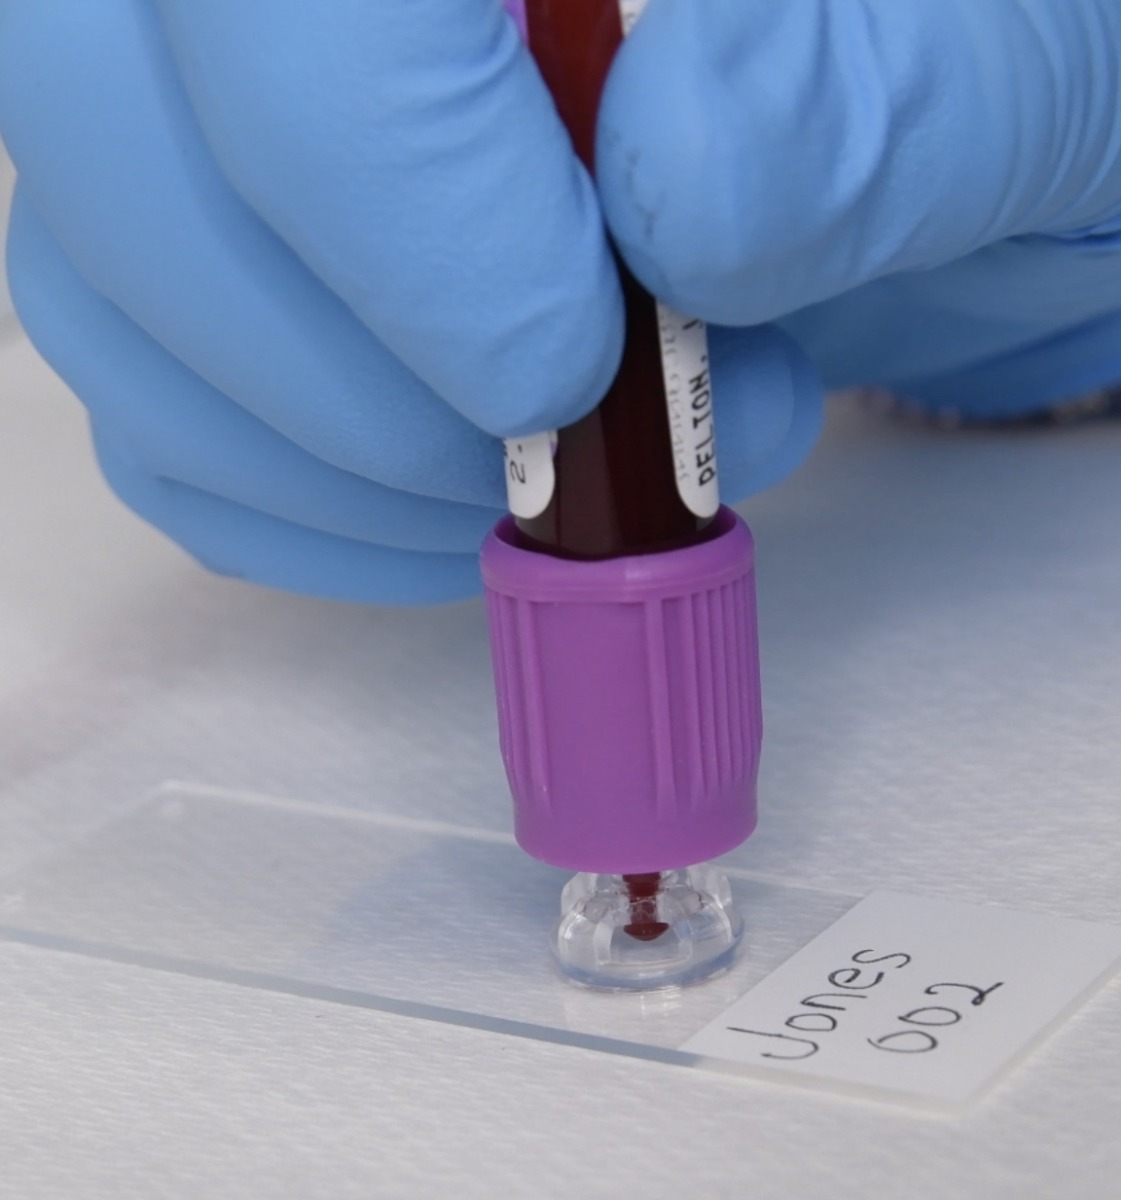
The purple top blood collection tube contains the EDTA anticoagulant. Blood cells that are hemolyzed due to excessive age, freezing, or heat should not be used.
The basic blood slide preparation method is as follows:
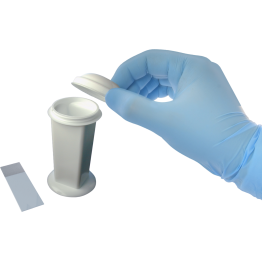
1. Obtain two clean slides.
- It is imperative that all slides used for staining be completely clean and free from all oils, lint, and dust.
- To label the slide, use a chemical resistant marker that will not run or fade when the slide is stained.
2. Center a small drop of blood on a pre-cleaned, labeled slide.
- Place the drop near the frosted end of the slide using a capillary tube or Diff-Safe blood dispenser. You can also use a drop of blood from the purple stopper of the blood drawing tube.
- To do this, invert the tube once, then remove the stopper and tap it to the slide. Note: use a small drop of blood in order to create a thin smear
3. Bring another clean spreader slide in at a 30-45° angle up to the drop until it touches the edge.
- Allow the drop to spread along the contact line of the spreader slide by capillary action.
4. Maintain the same angle and push the spreader slide forward, using a smooth continuous motion.
- Use a constant motion and do not go back over the smear. Push the spreader slide all the way to the end of the smear slide.
5. Make sure the smear has a good feathered edge at the area farthest from the starting point.
- This is achieved by using the correct amount of blood and a smooth, consistent spreading technique.
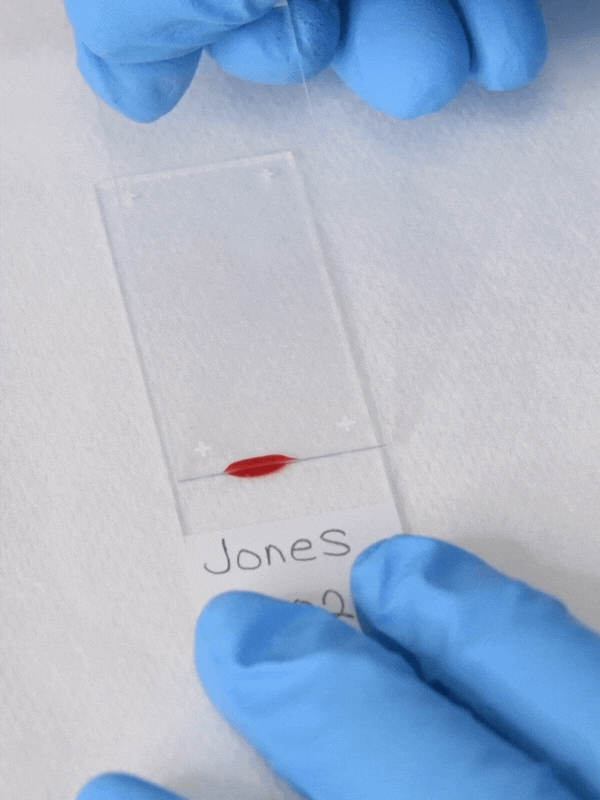
This will create a smear that is only one cell thick, called a “monolayer.” You will want all the cells to be spread out and not stacked one on another.
Allow the smear to air dry. If staining multiple slides, place the slide in a slide holder.
Prepare reagents for the Wright-Giemsa Stain:
Prepare reagents and perform the stain procedure in a fume hood or well-ventilated area and keep containers covered to reduce the impact of fumes and evaporation in the work environment.
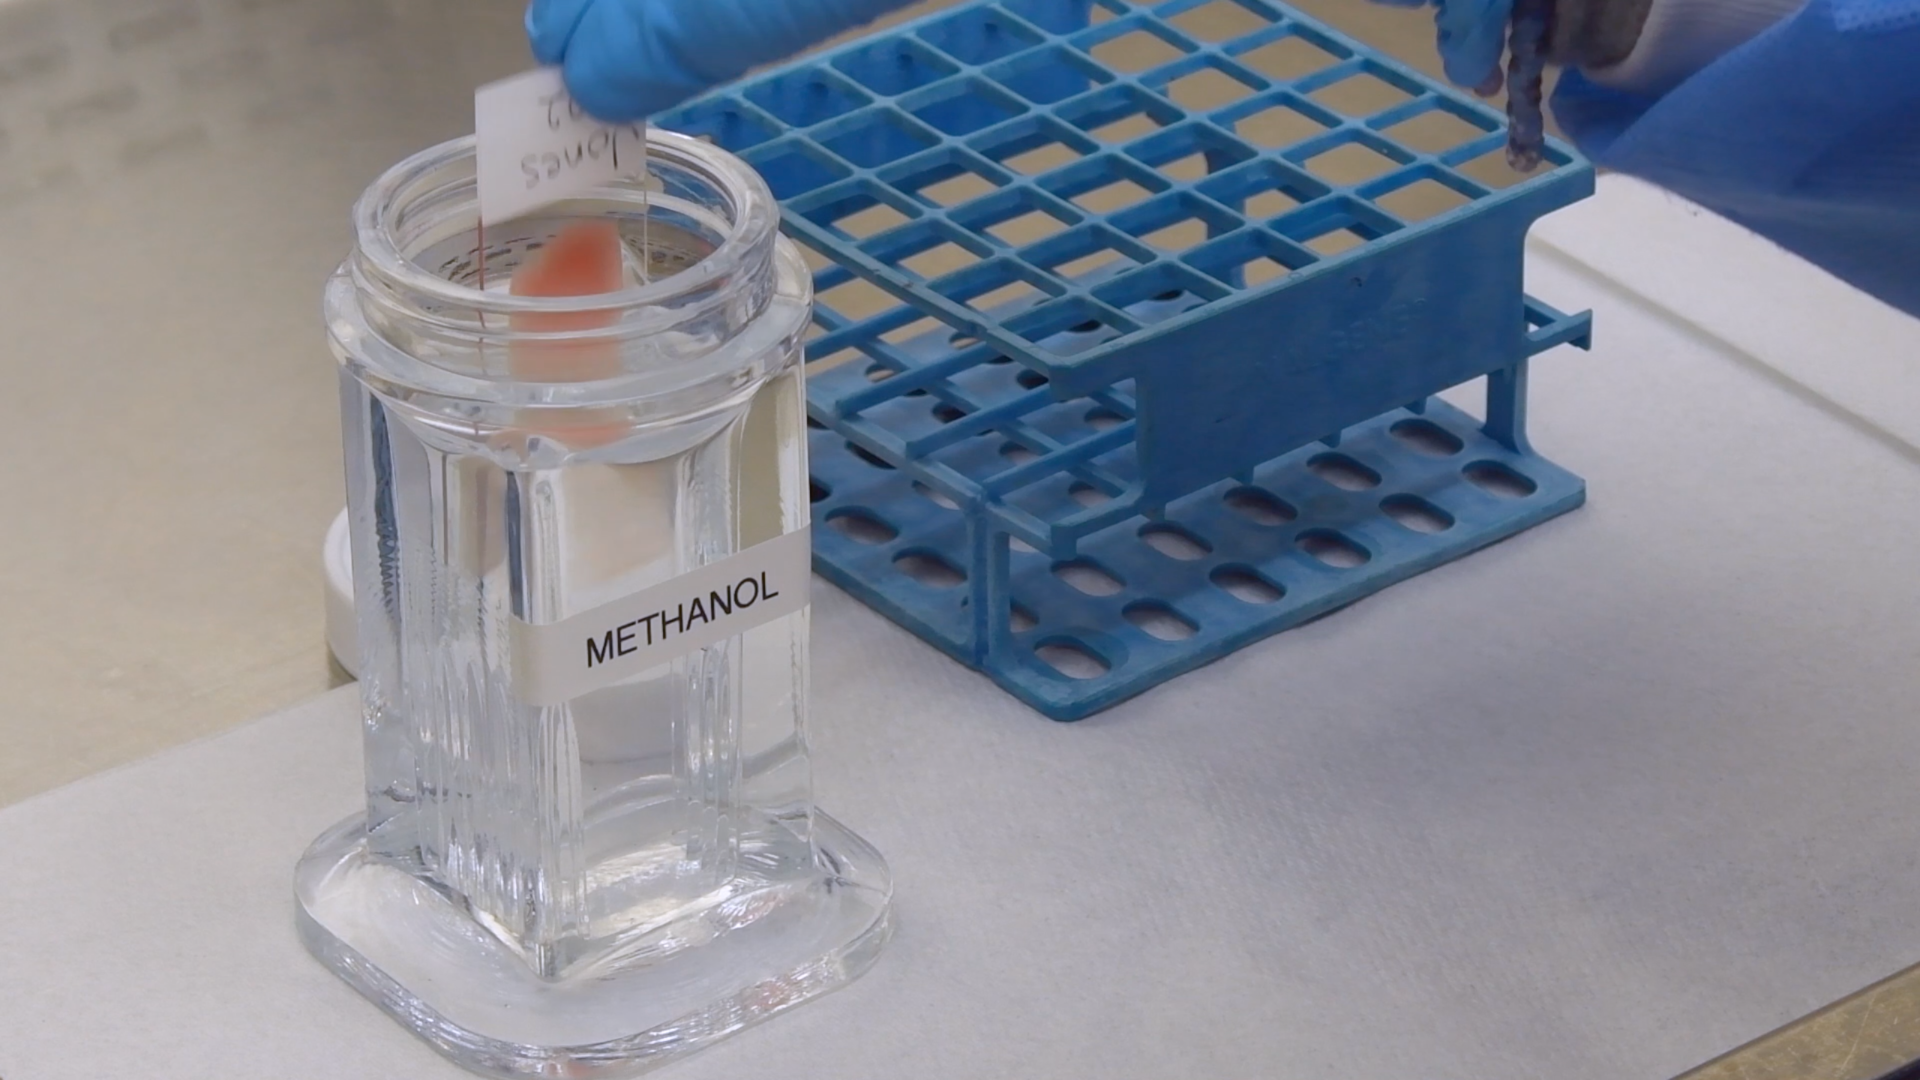
- Fill a container with methanol for the fixation step.
- Prepare three containers for staining, such as Coplin jars, with tightly fitting covers or screw caps.
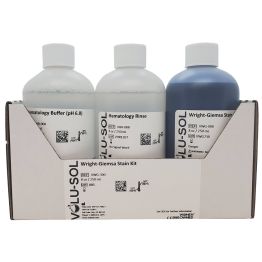
- Fill container 1 approximately half full with Wright-Giemsa stain.
- Fill container 2 using a similar volume with hematology buffer solution.
- Fill container 3 with a similar volume of hematology rinse solution.
- For fresh reagents, prime container 2 with a small amount of Wright-Giemsa stain prior to processing slides.
- Change the buffer when an iridescent film forms on the surface or when the buffer becomes discolored or dark blue.
- Change the rinse solution when it discolors to a medium blue.
- Replace the Wright-Giemsa stain in container 1 with fresh reagent when the volume is insufficient to stain slides.
Note: Replace the rinse water frequently when discolored or when an iridescent film forms. Replace the stain with fresh stain when the volume is insufficient to cover the smear.
*If performing the Rapid Wright’s One-Step stain, known as “Stat Satin”, this reagent already contains the buffer so the second and third containers can be filled with distilled or deionized water.
Hardy Diagnostics proudly offers all supplies needed to perform a Wright-Giemsa Stain:

Performing the Wright-Giemsa Stain:
The following procedure is recommended for staining peripheral blood smears. Bone marrow slides may require two to three times the exposure time for the stain and buffer.
Staining and buffering times should be adjusted to individual preference. For making blood slides using the Rapid Wright’s One-Step stain, adjust the times as described or double these times for bone marrow smears.
Step 1
In a fume hood, fix the slide using absolute methanol for at least 30 seconds. This will ensure cells attach to the slide and will not wash away during the staining procedure. This will also ensure the best stain quality.
When finished, allow the slide to air dry. Do not use heat to fix or dry the slide, as heat will distort and alter the cell morphology and interfere with the staining characteristics.
Step 2
When dry, place the slide in container 1 with the Wright-Giemsa stain and allow it to stain for 60 seconds. Do not agitate the container. Increasing or decreasing the stain time will alter the color of the finished slide.
NOTE: When using the Rapid Wright’s One-Step Stain reagent, place the slide in container 1 for 15-30 seconds.
Step 3
Remove the slide and drain or blot the edge of the slide or slide holder on a paper towel to remove excess stain. Do not blot or touch the smear.
Step 4
Dip or place the slide in container 2 with the buffer for approximately 60 seconds. Increasing or decreasing the buffer time will alter the color of the finished slide.
NOTE: When using the Rapid Wright’s One-Step Stain reagent, place the slide in container 2 for 15 to 45 seconds.
Step 5
Remove the slide from container 2 and drain or blot the edge of the slide or slide holder with a paper towel to remove excess buffer. Do not blot or touch the smear
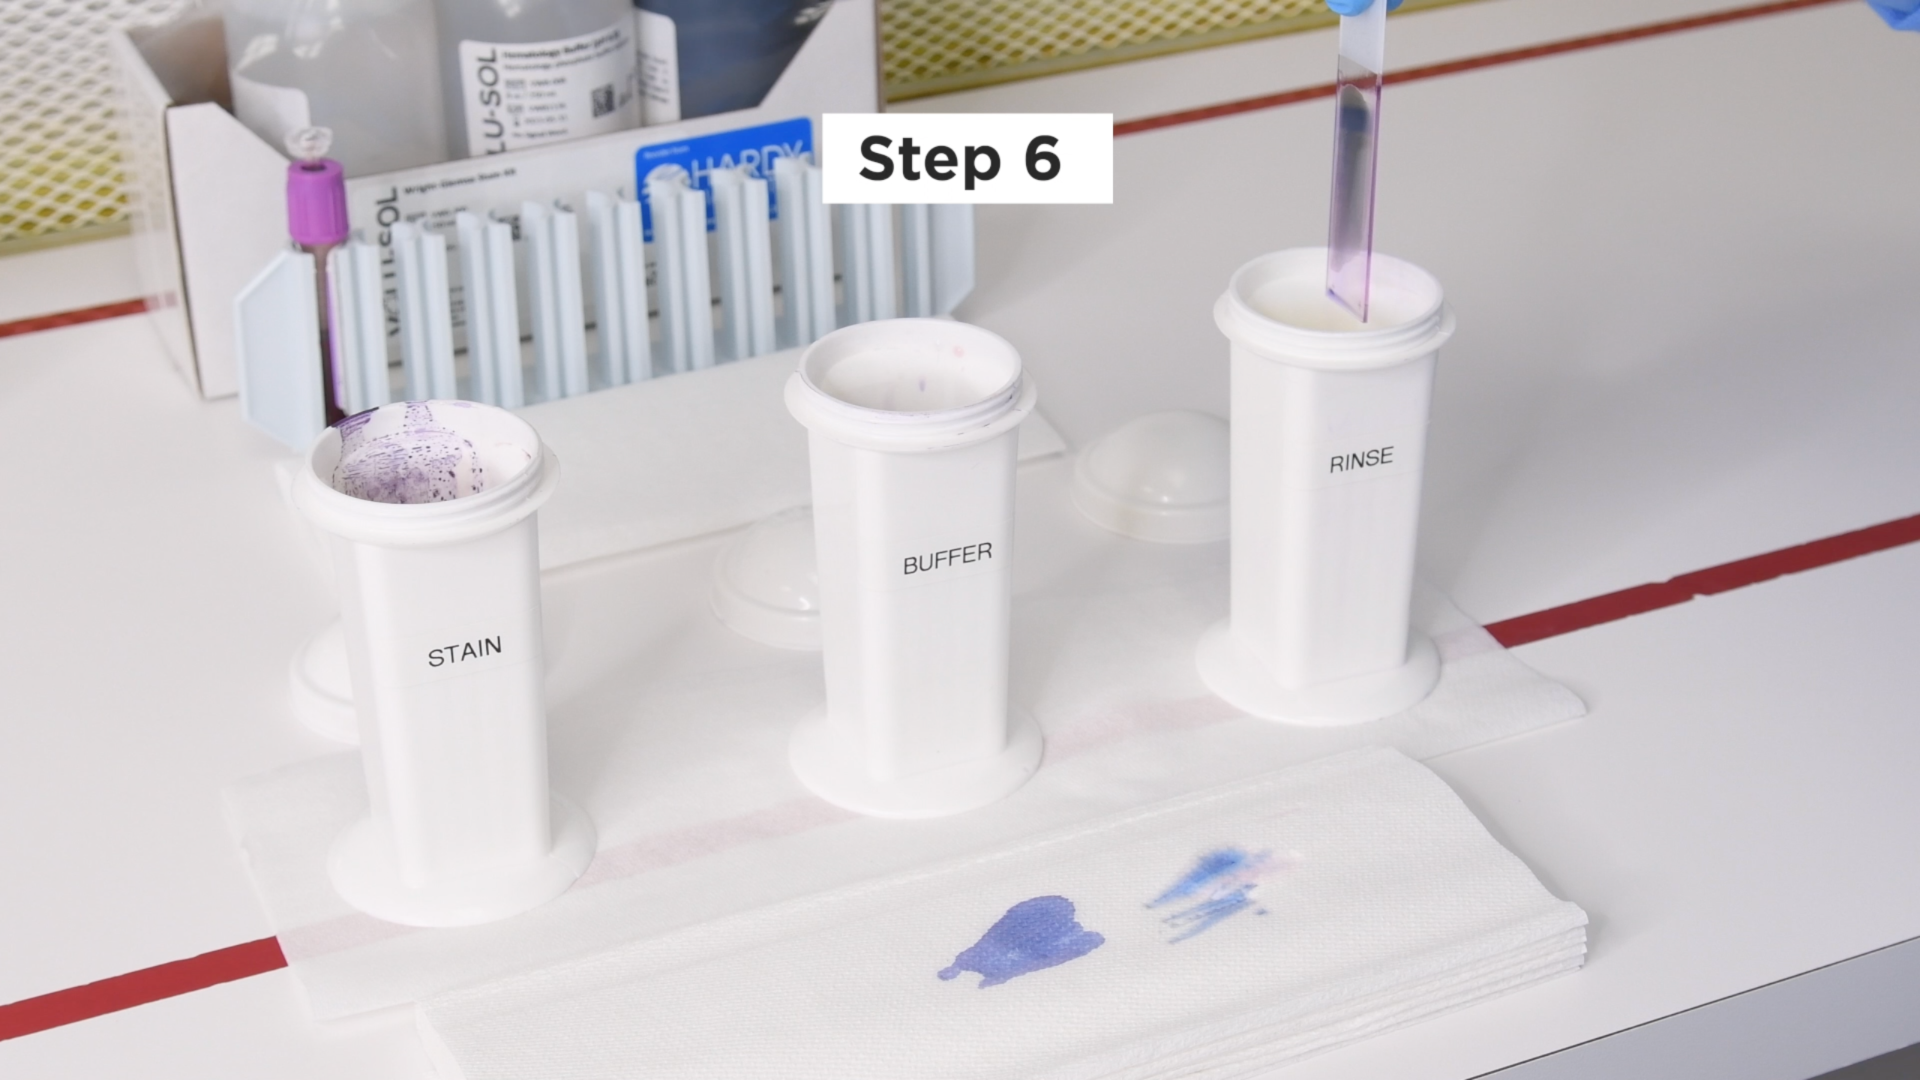
Step 6
Dip the slide in container 3 with the rinse solution for 2-10 seconds. When using the Rapid Wright’s One-Step Stain reagent, dip the slide repeatedly using quick dips into container 3 for 25 seconds. Alternatively, the slide can be swirled in container 3 for 25 seconds.
NOTE: Excessive buffering and rinsing will fade and decolorize the stain.
Step 7
Dry the slide in a vertical position in a slide rack or on an absorbent surface such as a paper towel. Do not blot or touch the smear.
Step 8
Place the slide on the microscope stage and focus at the lowest power. Then incrementally increase the magnification power and adjust focus until you've reached the high dry 40 power objective lens.
Carefully move the 40 power objective lens to the side, then place a drop of immersion oil on the slide and switch lenses to the oil immersion 100 power lens. This will result in a magnification of 1,000 power.
Step 9
Use the following images and table as a guide.
| Cell or Cell Type | Appearance | |
| Red Blood Cells | Pink-tan color with a degree of heterochromasia | 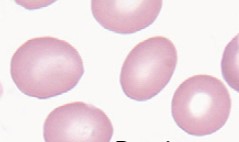 |
| White Blood Cells | Nuclei with bright, bluish-purple chromatin light blue cytoplasm | 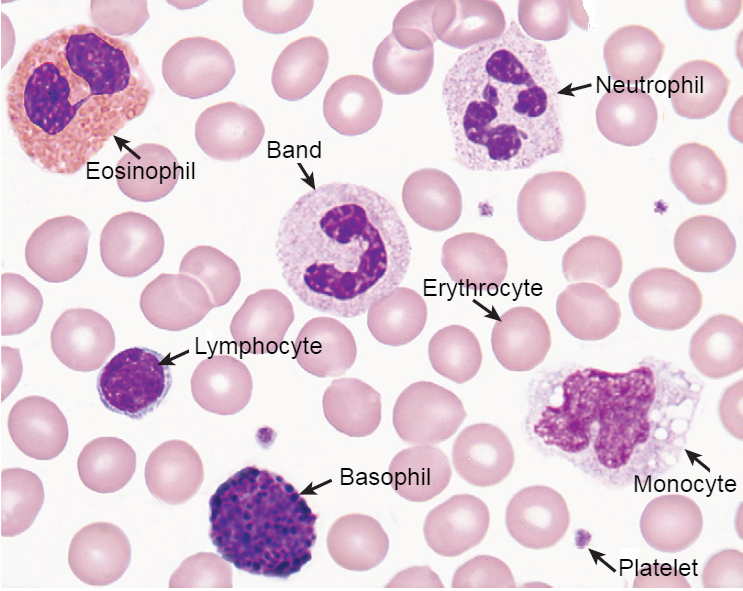 |
| Lymphocytes | Clear blue cytoplasm, red-purple granules may be present. Acidic stain yields pale blue cytoplasm, whereas alkaline stain yields gray or lavender lymphocyte cytoplasm | 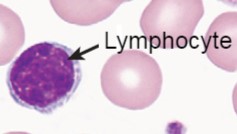 |
| Monocytes | Mosaic of pink and bluish-grey cytoplasm, azure granules usually present | 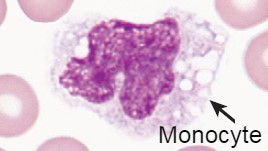 |
| Neutrophils | Light purplish-pink or lavender granules in cytoplasm. Acidic stain yields pale neutrophilic granules, whereas a basic stain yields deep gray or blue eosinophilic granules | 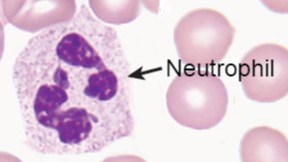 |
| Eosinophils | Bright red or reddish-orange granules in cytoplasm. Acidic stain yields brilliant and distinct red granules, wheras basic stain yields deep gray or blue eosinophilic granules | 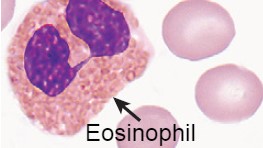 |
| Basophils | Deep purple and violet-black granules in cytoplasm | 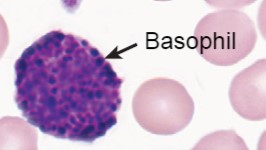 |
| Platelets | Red-purple granules in light blue cytoplasm |  |
NOTE: The overall color of the red blood cells is a benchmark to stain quality and can be used as a guide when determining the need for adjustments to staining and buffering times for desired results.
Wright-Giemsa stain tutorial video is now available!
Our experts at Hardy Diagnostics created an easy-to-follow video tutorial on this procedure, which you can watch below!
Learn with Hardy Diagnostics: Your Partners in Microbiology
By combining visual and written content, Hardy Diagnostics offers a comprehensive learning experience that caters to different learning styles. Subscribe to our YouTube Channel for the latest tutorial videos, and explore more Lab Tutorial Blogs for written step-by-step instructions. Stay ahead in your field with Hardy Diagnostics, your trusted partner in microbiology education.